Sandblasting Tips and Tricks
Sandblasting is not as ominous as it sounds. It’s a process that uses a concentrated stream of an abrasive to remove paint or other coatings from a surface or alter the surface in some way. Using a sandblaster takes less time than using sandpaper and is better for reaching corners. It also removes rust.
Here are a few tips to use if you’re new to sandblasting.
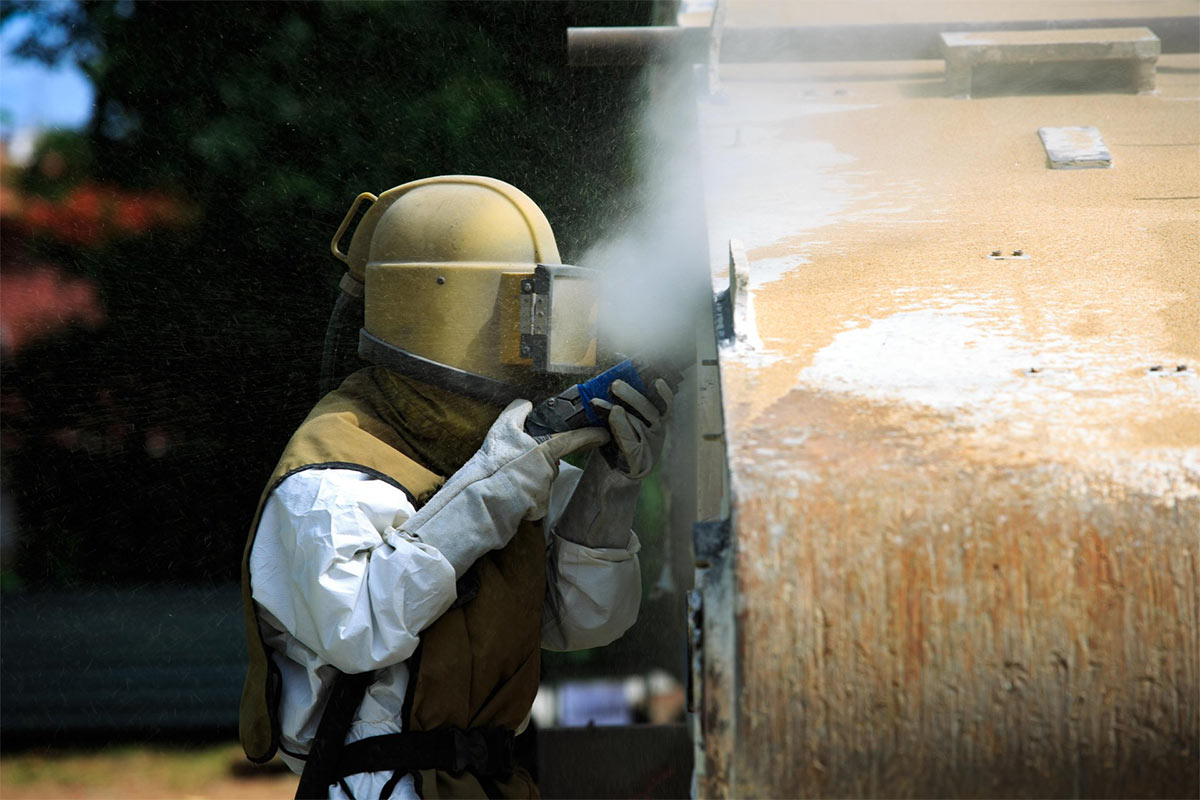
Safety first
The first step is to protect and prepare. Always use the appropriate protective accessories such as glasses, sandblaster gloves, a face shield, a hood, and a dust mask. The abrasive particles can irritate the eyes and skin.
Do the prep work
Like a good paint job, good results with media-blasting depend on how well the surface is primed. When working on cabinets, cleaning and removing any dirt, oil residue, stickers, or tape followed by pressure-washing should be the first steps.
Use the right “sand”
This can actually mean not using sand at all. While sand may be one of the cheapest kinds of abrasive blast media, it comes with serious risks due to the health dangers of silica. Thus, it requires full protective equipment, including a proper respirator and heavy-duty clothing. The emergence of non-sand based abrasives in recent years has led to industry experts, such as the professionals at Cyclone Sandblasters, to strongly recommend the usage of glass beads or garnets which are among a variety of generally safer blast abrasives. Other options for cabinetry include soda, walnut shells, or pumice depending on the type of wood you’re working with.
Use the right tools
The tools are just as important as the media for blasting projects. An indispensable tool for smaller projects such as cabinets and woodworking is a sand blasting cabinet, such as the Model FT-6035 abrasive blast cabinet.
Choosing the nozzle
Media always drives nozzle size. On the soft end with soda, you’ll be working with a 3/32-inch nozzle compared to 1/8 inch for pumice.
Do plenty of test runs with your media of choice on some scrap material. Testing helps you troubleshoot any problems with media, nozzle size or blast pressure as they arise.
Pressurized abrasive blasters pack 30 percent more blasting power than siphon blasters. For most cabinet projects depending on material, a setting of between 40 but not higher than 100 pounds. PSI is a good place to start. On higher pressures towards the end of that range (especially with wood), it’s better to position the nozzle at a 90-degree angle to minimize low spots.
Using the nozzle
Surface profiles of well-blasted finishes at high pressure should be evenly distributed with ripples out like disturbed water. With your blasting gun, always maintain a minimum distance of between 5 to 8 inches from the cabinet. Move in fluid sweeping motions, being careful of any soft spots in the wood because these are more prone to becoming low spots.
If you’re confident enough to try something a bit fancier, try using stencils to create a decorative effect on the surface.
Precision to the end
The finish of any project can be as important as priming. Go through your cabinet thoroughly with tack cloths to make sure everything is evenly removed. If you have any low spots or unevenness in the cabinetry, go in with a wood filler and putty knife to fix them. Then stand back to admire your work.
Sandblasting is a skilled but efficient way to renovate cabinets, so try out these tips on your next project.
